Kitchen Sink Tap Repair - Mini Pro Brushed Steel Single Lever Pullout Kitchen Sink ... - Unscrew the rest of the valve cover.
Dapatkan link
Facebook
X
Pinterest
Email
Aplikasi Lainnya
Kitchen Sink Tap Repair - Mini Pro Brushed Steel Single Lever Pullout Kitchen Sink ... - Unscrew the rest of the valve cover.. Pay close attention to the order and orientation of parts as you remove them. This old house plumbing and heating expert richard trethewey helps a homeowner repair her leaky kitchen faucet. You may need to turn on the water to see where it drips, or even fill the sink and let the water stand for a few minutes before the leak appears. In this video i give a step by step guide of how to fix a tap that is leaking at the base of the neck or faucet. Before you begin to fix a dripping faucet, your first step is to shut off the water supply.
Make sure the drains are plugged to prevent small parts from falling in. Once you gain access to the nut, it's just a simple case of tightening it to fix the faucet base securely in place. Replacing the worn out parts in the faucet will create a better seal and help prevent water leaks. The total cost to repair your bathroom or kitchen sink will largely depend on the type of problem you're experiencing, any parts needed to repair them, and the extent of the damage to your fixture and plumbing. If there's one faucet that's prepared to bring out your inner chef at the drop of an impromptu dinner party, neera is it.
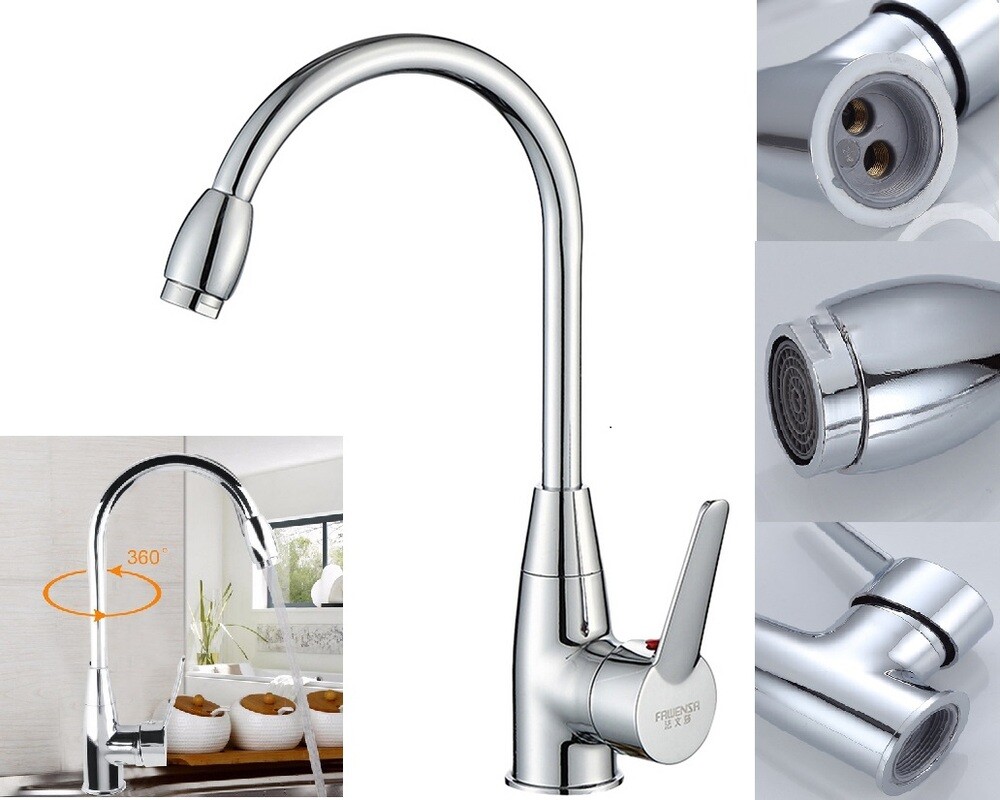
Kitchen Sink Mixer Basin Tap Single Lever Taps Swivel ... from i.ebayimg.com This old house plumbing and heating expert richard trethewey helps a homeowner repair her leaky kitchen faucet. You can use pliers to loosen and remove the nut that holds the cartridge. Replacing the worn out parts in the faucet will create a better seal and help prevent water leaks. When it comes to repairing a mixer tap, the spout is the weak link and can sometimes leak at the base. Then, use a screwdriver to remove the handle to expose the top of the valve. In the past, a plumber only needed to know how to fix a compression spout, but modern versions can have one of three other valve mechanisms that were developed around the middle of the 20th century. Finally, cover the sink drain holes with strainer baskets or rags to avoid losing small parts down the drain. Have a towel or a bucket ready to collect any leakage.
The large end of springs go in first and the seats (the rubber things) slip down over the spring.
After you turn off the water, open the faucet in the center position to relieve water pressure and make sure the water is shut off. Close the drain and place a towel in the sink to protect the surface and catch any dropped parts. Kitchen mixer taps can be difficult to fix, but luckily in this video it was one of the easiest taps i have ever had to fix. Unscrew the rest of the valve cover. As the #1 faucet brand in north america, moen offers a diverse selection of thoughtfully designed kitchen and bath faucets, showerheads, accessories, bath safety products, garbage disposals and kitchen sinks for residential and commercial applications each delivering the best possible combination of meaningful innovation, useful features, and. Kitchen faucets have become streamlined and a bit more complicated over the years, but faucet repair is still fairly straightforward. How to tighten a loose kitchen sink faucet the faucet handle and base are the two critical points that often become loose. The individual water controls (hot and cold) on either side are repaired and serviced as individual taps and repair information for leaks and failure here can be found in our repairing a dripping tap project. Make sure the drains are plugged to prevent small parts from falling in. Twist the valve under your sink to turn off the water supply. Once you gain access to the nut, it's just a simple case of tightening it to fix the faucet base securely in place. Pay close attention to the order and orientation of parts as you remove them. I believe the tap was purchased.
Replacing the worn out parts in the faucet will create a better seal and help prevent water leaks. The above instructions are strong guidelines to help you understand how to repair your tap, but it's important to check with your model's manufacturer to ensure you use the correct approach. Close the drain and place a towel in the sink to protect the surface and catch any dropped parts. Pay close attention to the order and orientation of parts as you remove them. After that, you can lift the cartridge out of its place.
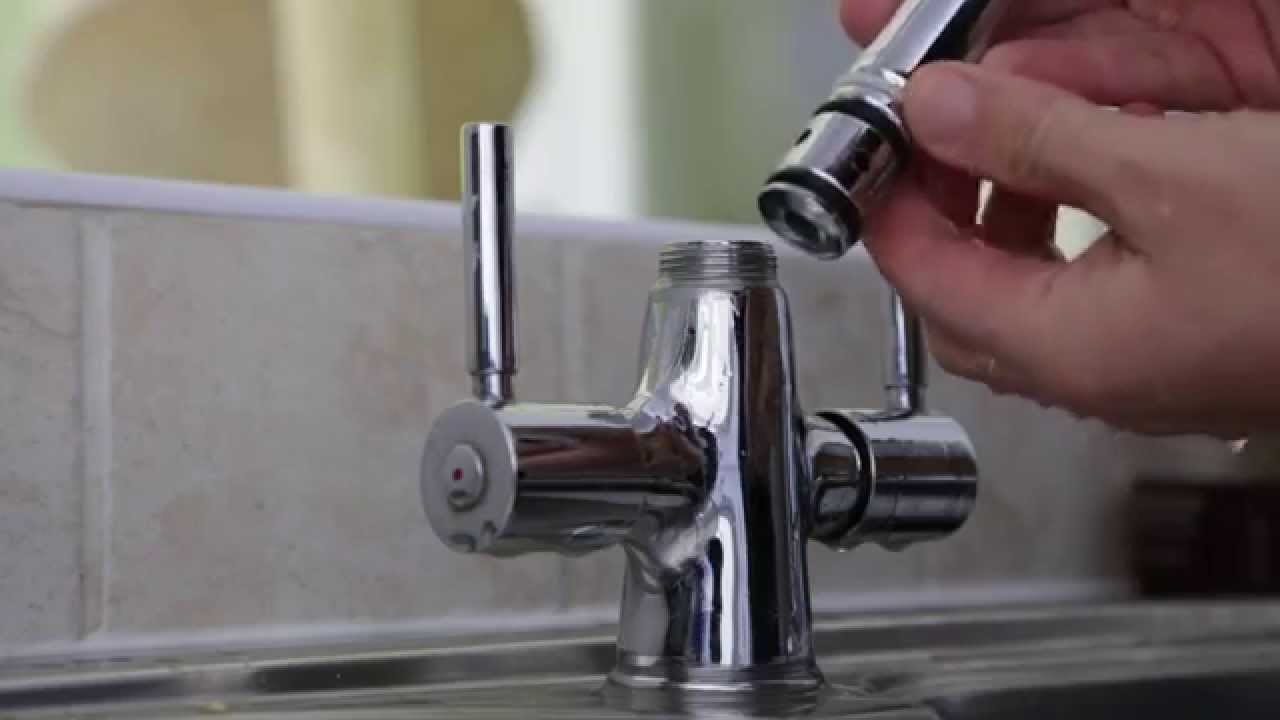
How to Repair Washer in Leaking mixer tap from Base by ... from i.ytimg.com Mixer taps comprise of three seperate areas when it comes to repair. Then what you see is the cartridge. I show how to remove the neck from the base. You can't grab the flattened edges with the handle in place. After you turn off the water, open the faucet in the center position to relieve water pressure and make sure the water is shut off. The large end of springs go in first and the seats (the rubber things) slip down over the spring. Close the drain and place a towel in the sink to protect the surface and catch any dropped parts. This powerhouse is packed with features for chefs and foodies alike.
The main difficulty comes in accessing that nut since it will be located under the sink.
Tightening a kitchen faucet base is an easy job because all you need to do is tighten a nut. Use an adjustable spanner to loosen the valve then remove it. A dripping mixer tap can be incredibly annoying and a waste of water, but fixing a tap can be surprisingly easy. After you turn off the water, open the faucet in the center position to relieve water pressure and make sure the water is shut off. You can't grab the flattened edges with the handle in place. In the past, a plumber only needed to know how to fix a compression spout, but modern versions can have one of three other valve mechanisms that were developed around the middle of the 20th century. When it comes to repairing a mixer tap, the spout is the weak link and can sometimes leak at the base. You can use pliers to loosen and remove the nut that holds the cartridge. As you disassemble the old faucet, lay the parts in order on a flat surface and snap a picture for reference. Close the drain and place a towel in the sink to protect the surface and catch any dropped parts. Before you begin to fix a dripping faucet, your first step is to shut off the water supply. The above instructions are strong guidelines to help you understand how to repair your tap, but it's important to check with your model's manufacturer to ensure you use the correct approach. Once you gain access to the nut, it's just a simple case of tightening it to fix the faucet base securely in place.
Be sure to line up the faucet parts in the order in which you remove them. Check the piping and drain line for any loose fittings. Use an adjustable spanner to loosen the valve then remove it. There is a cover on the faucet's screw. Close the drain and place a towel in the sink to protect the surface and catch any dropped parts.
How to Fix a Leaky Faucet | Leaking kitchen faucet, Faucet ... from i.pinimg.com After that, you can lift the cartridge out of its place. To fix a leaky faucet, first turn off the water to your faucet by twisting the valve under the sink. Turn off the water at the valves under the sink, and turn on the faucet to allow the water to drain. In this video i give a step by step guide of how to fix a tap that is leaking at the base of the neck or faucet. Turn the faucet on to empty any water in the pipes, and plug the drain so nothing falls down it while you're working. If there's no valve, turn off the water supply for your whole house. In the past, a plumber only needed to know how to fix a compression spout, but modern versions can have one of three other valve mechanisms that were developed around the middle of the 20th century. Close the drain and place a towel in the sink to protect the surface and catch any dropped parts.
You should press firmly to seat the washer almost flush with the bottom of the socket.
To fix a leaky faucet, first turn off the water to your faucet by twisting the valve under the sink. How to tighten a loose kitchen sink faucet the faucet handle and base are the two critical points that often become loose. Make sure the drains are plugged to prevent small parts from falling in. Replacing the worn out parts in the faucet will create a better seal and help prevent water leaks. Since a faucet pivots on its center, repeated use might cause the faucet base nuts to become loose. Rp25513 faucet stem replacement for delta faucet repair kit + rp4993 seat and spring, rp24096 + rp24097 1/4 turn stop 4.6 out of 5 stars 590 $15.99 $ 15. This powerhouse is packed with features for chefs and foodies alike. Check the sealant around the sink drain and faucet for any faulty caulk. As you disassemble the old faucet, lay the parts in order on a flat surface and snap a picture for reference. If there's no valve, turn off the water supply for your whole house. Take your screwdriver and pry it off. After that, you can lift the cartridge out of its place. You should press firmly to seat the washer almost flush with the bottom of the socket.
Be sure to line up the faucet parts in the order in which you remove them kitchen sink repair. Close the drain and place a towel in the sink to protect the surface and catch any dropped parts.
The Cause and Effect (a.k.a. Fishbone) Diagram When utilizing a team approach to problem solving, there are often many opinions as to the problem's root cause. One way to capture these different ideas and stimulate the team's brainstorming on root causes is the cause and effect diagram, commonly called a fishbone. The fishbone will help to visually display the many potential causes for a specific problem or effect. It is particularly useful in a group setting and for situations in which little quantitative data is available for analysis. The fishbone has an ancillary benefit as well. Because people by nature often like to get right to determining what to do about a problem, this can help bring out a more thorough exploration of the issues behind the problem – which will lead to a more robust solution. To construct a fishbone, start with stating the problem in the form of a question, such as "Why is the help desk...
Take Me To The Closest Auto Parts Store / Auto Repair Shops Near Me - Find the Right One in Phoenix - Take me to the closest auto parts store. . We did not find results for: Check spelling or type a new query. Maybe you would like to learn more about one of these? Take me to the closest auto parts store. Take me to the closest auto parts store. Check spelling or type a new query. We did not find results for: Maybe you would like to learn more about one of these? Kia Sedona 2007 For Sale in Monroe, LA - Salvage Cars from www.salvage-parts.com Check spelling or type a new query. Take me to the closest auto parts store. We did not find results for: Maybe you would like to learn more about one of these? Check spelling or type a new query. Maybe you would like to learn more about one of these? We did not find results for: Check s...
Extending Dining Table And 4 Chairs Ukfcu / Dining Set Dining Table And Chair Set Dining Room Set Cfs : Check spelling or type a new query. . We did not find results for: Maybe you would like to learn more about one of these? Check spelling or type a new query. Extending dining table and 4 chairs ukfcu. Maybe you would like to learn more about one of these? We did not find results for: Extending dining table and 4 chairs ukfcu. Check spelling or type a new query. Oxford Natural Oak Mink Microsuede Extending Dining Set With 4 Chairs Wilko from www.wilko.com We did not find results for: Maybe you would like to learn more about one of these? Extending dining table and 4 chairs ukfcu. Check spelling or type a new query. Maybe you would like to learn more about one of these? We did not find results for: Check spelling or type a n...


Komentar
Posting Komentar